


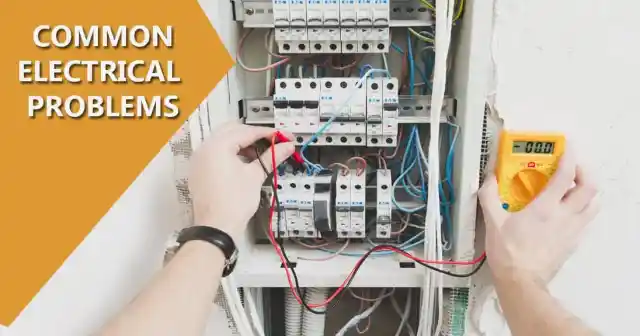
Have you ever experienced an electrical failure and felt lost on how to handle it? In this article, we will explore 5 common electrical failures that you may encounter and provide you with practical tips on how to deal with them effectively. Whether it’s a blown fuse, a tripped circuit breaker, or a faulty outlet, we’ve got you covered. Get ready to become your own electrician as we guide you through these common issues and help you regain power in no time. Let’s dive into the world of electrical failures and learn how to overcome them like a pro.
1. Electrical failure: Power outage
A power outage can be a frustrating experience, but there are a few steps you can take to address the issue. The first thing you should do is check the main power source. Ensure that the power switch is in the “on” position and that there are no loose connections or issues with the power supply coming into your home. If everything appears to be normal with the main power source, then the next step is to check the circuit breakers.
1.1 Checking the main power source
To check the main power source, locate the main electrical panel in your home. It is usually located in the basement, utility room, or garage. Open the panel door and check if the main power switch is in the “on” position. If it is in the “off” position, flip it back to “on” and see if power is restored. If not, proceed to the next step.
1.2 Resetting the circuit breakers
When there is a power outage, it is possible that one or more circuit breakers may have tripped. Locate the circuit breaker panel, which is usually near the main electrical panel. Open the panel door and look for any switch that is in the middle or “off” position. If you find any, flip them back to the “on” position. This should restore power to the affected areas in your home.
1.3 Investigating faulty appliances
If resetting the circuit breakers doesn’t solve the power outage, it is important to investigate if any faulty appliances are causing the issue. Unplug all appliances and devices from the electrical outlets throughout your home. Then, one by one, plug them back in and check if the power outage occurs again. If you find that a specific appliance is causing the problem, have it repaired or replaced by a professional.
1.4 Contacting the utility company
If you have checked the main power source, reset the circuit breakers, and ruled out any faulty appliances, it’s time to contact your utility company. Reach out to them and inform them about the power outage. They will be able to provide you with information on any ongoing outages in your area and an estimated time for power restoration. Additionally, if the issue is not related to your home’s electrical system, the utility company will be able to address the problem on their end.
1.5 Using a backup generator
In instances where the power outage is prolonged or frequent in your area, it may be beneficial to invest in a backup generator. A backup generator can provide temporary power to essential appliances and systems in your home until the utility company restores electricity. Consult with a licensed electrician to determine the appropriate size and type of backup generator for your needs.
2. Electrical failure: Tripped circuit breaker
A tripped circuit breaker can cause a specific area of your home to lose power while the rest remains unaffected. Here are the steps to deal with a tripped circuit breaker.
2.1 Identifying the tripped circuit
When a circuit breaker trips, you will likely notice that one or more areas of your home have lost power. Start by identifying which circuit has tripped. This can be done by checking the position of the switches in the circuit breaker panel. The switch that is in the middle or “off” position indicates the tripped circuit.
2.2 Resetting the circuit breaker
To reset a tripped circuit breaker, you need to flip the switch all the way to the “off” position and then back to the “on” position. This should restore power to the affected area. However, it is important to note that if the circuit breaker continues to trip immediately after being reset, there may be an underlying issue that needs to be addressed.
2.3 Investigating the cause of overload
If you find that a specific circuit breaker keeps tripping frequently, it may be an indication of an overload. Overloading a circuit occurs when you have too many appliances or devices connected to it, drawing more power than the circuit can handle. Take note of which appliances are connected to the tripped circuit and assess if they are drawing excessive power. Consider redistributing the electrical load to different circuits to prevent overloading.
2.4 Distributing the electrical load
To prevent overloading a circuit, it is important to distribute the electrical load evenly across different circuits. Avoid plugging multiple high-power devices into the same circuit. Spread out the usage of appliances and devices across different circuits to ensure that no single circuit is overloaded. This can help prevent future tripped circuit breakers.
2.5 Seeking professional assistance
If you have tried resetting the circuit breaker and redistributing the electrical load but the circuit continues to trip frequently, it is recommended to seek professional assistance. A licensed electrician will be able to assess the electrical system, identify any underlying issues, and make the necessary repairs or upgrades to prevent future circuit breaker trips.
3. Electrical failure: Short circuit
A short circuit occurs when there is a direct connection between the hot wire and the neutral wire or ground wire. This can result in a sudden loss of power and potentially hazardous situations. Here’s how to deal with a short circuit.
3.1 Locating the affected circuit
When a short circuit occurs, you may experience a complete loss of power in a specific area or multiple areas of your home. Begin by determining which circuit is affected by the short circuit. This can be done by checking the circuit breaker panel and identifying the switch that is in the middle or “off” position.
3.2 Disconnecting devices from the circuit
To address a short circuit, you need to disconnect all devices connected to the affected circuit. This includes unplugging appliances, turning off lights, and disconnecting any other electrical devices. By removing the devices from the circuit, you eliminate potential sources of the short circuit and prevent further damage to the electrical system.
3.3 Inspecting for damaged wires
Once the devices are unplugged, inspect the electrical outlets and switches on the affected circuit for any signs of damage, such as charred or melted components. Additionally, check for any exposed or frayed wires that may be causing the short circuit. If you notice any damaged wiring, it is crucial to replace it to ensure the safety and proper functioning of your electrical system.
3.4 Replacing the faulty circuit breaker
If the cause of the short circuit is determined to be a faulty circuit breaker, it will need to be replaced. Faulty circuit breakers can cause repeated short circuits and pose a fire hazard. Consult with a licensed electrician to ensure the correct type and size of circuit breaker is installed as a replacement.
3.5 Hiring a licensed electrician
Dealing with a short circuit can be complex and potentially dangerous. It is recommended to hire a licensed electrician to address this issue. They have the expertise and knowledge to safely identify and rectify the cause of the short circuit. A licensed electrician will also ensure that any necessary repairs or replacements are done correctly, preventing future short circuits and maintaining the safety of your electrical system.
4. Electrical failure: Ground fault
A ground fault occurs when the hot wire comes into direct contact with the ground wire or metal box, resulting in a sudden loss of power and potential electrical hazards. Follow these steps to deal with a ground fault.
4.1 Identifying the affected circuit
A ground fault may cause a specific circuit or multiple circuits to lose power. Begin by identifying which circuit is affected by checking the circuit breaker panel. The switch in the middle or “off” position indicates the affected circuit.
4.2 Resetting the ground fault circuit interrupter (GFCI) outlet
In many cases, ground faults are triggered by a tripped GFCI outlet. GFCI outlets are equipped with built-in circuit breakers that protect against electrical shocks. Locate the GFCI outlet on the affected circuit and look for the “reset” button. Press the “reset” button to restore power to the circuit. If the GFCI outlet trips again immediately after being reset, there may be a ground fault elsewhere on the circuit that needs to be addressed.
4.3 Inspecting for damaged wires
Once the GFCI outlet is reset, check the other electrical outlets and switches on the affected circuit for any signs of damage, such as charred components or exposed wires. If you identify any damaged wiring, it is important to replace it to ensure the safety of your electrical system.
4.4 Replacing the faulty GFCI outlet
If the ground fault continues to trip the GFCI outlet after resetting and inspecting for damaged wires, it is likely that the GFCI outlet itself is faulty and needs to be replaced. Consult with a licensed electrician to choose a suitable replacement GFCI outlet and ensure proper installation.
4.5 Consulting an electrician
While resetting the GFCI outlet and replacing faulty components may resolve some ground faults, it is recommended to consult an electrician for a thorough inspection and resolution of the issue. An electrician will be able to identify any hidden ground faults or wiring problems that can pose hazards. They can also provide guidance on the best practices for electrical safety.
5. Electrical failure: Overloading of circuits
Overloading a circuit occurs when the demand for electricity exceeds the circuit’s capacity, leading to a tripped circuit breaker or potential fire risk. Here’s how to deal with overloading of circuits.
5.1 Understanding electrical load capacity
Each electrical circuit has a load capacity, which represents the maximum amount of power it can safely handle. Exceeding this capacity can lead to overloading. It is crucial to familiarize yourself with the load capacity of each circuit in your home to avoid overloading.
5.2 Distributing the load evenly
To prevent overloading, distribute the electrical load evenly across different circuits. Avoid connecting high-power appliances or devices to the same circuit. Spread out the usage of heavy-duty appliances, such as air conditioners or space heaters, across multiple circuits to ensure that no single circuit is overloaded.
5.3 Using power strips with circuit breakers
Using power strips or surge protectors with built-in circuit breakers can help prevent overloading of circuits. These devices automatically trip the circuit breaker if the load exceeds a safe limit. They provide an additional layer of protection by safeguarding against overloading and potential electrical hazards.
5.4 Upgrading electrical panels if necessary
In older homes, the electrical panels may not be equipped to handle the electrical demands of modern appliances and devices. If you frequently experience tripped circuit breakers due to overloading, it may be necessary to upgrade your electrical panels. Consult with a licensed electrician to assess the capacity of your current electrical system and determine if an upgrade is needed.
5.5 Enlisting professional help
If you are unsure about the load capacity of your circuits or continue to experience overloading issues, it is advisable to seek professional help. A licensed electrician can assess your electrical system, identify any potential hazards, and make the necessary upgrades or adjustments to prevent overloading and ensure the safety of your electrical system.
6. Electrical failure: Damaged wiring
Damaged wiring can pose significant risks, including electrical shocks and fire hazards. It is essential to address any signs of damaged wiring promptly. Follow these steps to deal with damaged wiring.
6.1 Identifying signs of damaged wiring
Signs of damaged wiring include flickering lights, burning smells, buzzing sounds, or outlets that are warm to the touch. Also, watch out for visible signs such as frayed or exposed wires, charred outlets, or electrical sparks. If you notice any of these signs, it is crucial to address the issue immediately.
6.2 Turning off power to the affected area
Before inspecting or repairing damaged wiring, turn off the power to the affected area. Locate the circuit breaker that corresponds to the area and flip the switch to the “off” position. This step ensures your safety and prevents further damage while working on the wiring.
6.3 Assessing the extent of damage
After turning off the power, carefully examine the damaged wiring. Look for any signs of wear, such as worn insulation, exposed wires, overheated areas, or signs of melting or burning. If the damage appears significant or extends beyond your expertise, it is essential to seek assistance from a licensed electrician to avoid risks and ensure proper repairs.
6.4 Repairing or replacing damaged wiring
Minor damage to the wiring can be repaired by carefully cutting out the damaged section and splicing together new wires. Ensure that the connections are secure, properly insulated, and meet electrical codes. However, it is crucial to note that any repairs performed on the wiring should be done by someone with experience and knowledge in electrical work.
6.5 Seeking assistance from a licensed electrician
For significant damage to the wiring or if you are uncertain of how to proceed with repairs, it is best to seek assistance from a licensed electrician. They have the expertise and proper training to handle complex electrical issues safely. A licensed electrician will be able to assess the extent of the damage, carry out the necessary repairs or rewiring, and ensure that your electrical system is safe and functional.
7. Electrical failure: Tripped ground fault circuit interrupter (GFCI) outlet
A ground fault circuit interrupter (GFCI) outlet is designed to protect against electrical shock. If a GFCI outlet trips, it cuts off the power supply to prevent potential hazards. Here’s how to deal with a tripped GFCI outlet.
7.1 Resetting the GFCI outlet
When a GFCI outlet trips, it removes power to the outlets connected downstream from the GFCI outlet. To reset the GFCI outlet, locate it and press the “reset” button. This should restore power to the outlets downstream and resolve the issue. However, if the GFCI outlet trips immediately after being reset, there may be an underlying problem that needs to be addressed.
7.2 Checking for faulty appliances
If the GFCI outlet continues to trip, it is essential to check for any faulty appliances that may be causing the issue. Unplug all appliances from the affected circuit and reset the GFCI outlet again. Plug each appliance back in, one by one, and check if the GFCI outlet trips. If a specific appliance causes the GFCI outlet to trip, have it inspected and repaired by a professional before using it again.
7.3 Inspecting for water exposure
GFCI outlets are commonly installed in areas that are prone to moisture, such as kitchens and bathrooms. Water exposure can trigger the GFCI outlet to trip. Inspect the area around the GFCI outlet for any signs of water exposure, such as leaking pipes or fixtures. If water is present, you may need to address the underlying issue, such as fixing leaks or installing appropriate waterproofing measures.
7.4 Replacing the GFCI outlet if necessary
If the GFCI outlet continues to trip after resetting and investigating potential causes, it is possible that the outlet itself is faulty and needs to be replaced. Faulty GFCI outlets can pose electrical hazards and should be addressed promptly. Consult with a licensed electrician to choose a suitable replacement GFCI outlet and ensure proper installation.
7.5 Consulting an electrician
If you have tried resetting the GFCI outlet, checked for faulty appliances, inspected for water exposure, and replaced the GFCI outlet if necessary, but the issue persists, it is recommended to consult with a licensed electrician. They will have the expertise to diagnose and resolve any complex electrical issues related to GFCI outlets, ensuring the safety and proper functioning of your electrical system.
8. Electrical failure: Faulty light switches
Faulty light switches can result in lights not turning on or flickering intermittently. Here are the steps to deal with faulty light switches.
8.1 Testing the light bulb
Before assuming that the light switch is faulty, it is important to test the light bulb. Replace the bulb with a known working one and check if the issue persists. Sometimes, a non-functioning light can be attributed to a faulty bulb rather than a faulty switch. If the new bulb works properly, then the issue was with the initial bulb.
8.2 Inspecting for loose connections
Loose connections can cause a light switch to malfunction. Turn off the power to the affected switch at the circuit breaker and remove the switch cover plate. Check the connections at the switch to ensure they are secure. Tightly tighten any loose terminal screws. If you notice any frayed or damaged wires, consult with a licensed electrician for repairs.
8.3 Replacing the light switch
If inspecting and tightening the connections does not resolve the issue, replacing the light switch may be necessary. Purchase a new switch that matches the type and style of the existing one. Ensure the power is off at the circuit breaker, remove the old switch, and replace it with the new one using the same wiring configuration. Test the new switch to confirm that it functions properly.
8.4 Consulting an electrician for complex issues
If the above steps do not resolve the issue with the light switch, it may indicate a more complex electrical problem. Consulting with a licensed electrician is recommended. They can assess the wiring, troubleshoot the issue, and make the necessary repairs to ensure safe and proper functionality of the light switch.
8.5 Ensuring proper installation for new switches
When replacing light switches or installing new ones, it is important to ensure proper installation. Follow the manufacturer’s instructions and consult a licensed electrician if you are unsure about any steps. Proper installation of switches is crucial for their safe and reliable operation.
9. Electrical failure: Flickering lights
Flickering lights can be an annoying and potentially dangerous electrical issue. Here’s how to deal with flickering lights.
9.1 Checking the light bulb connections
Start by checking the connections of the affected light bulb. Make sure it is tightly screwed into the socket and properly seated. Loose connections between the bulb and socket can cause flickering. If the connections are secure and the issue persists, move on to the next step.
9.2 Investigating loose wiring
Flickering lights may indicate loose wiring in the electrical circuit. Turn off the power to the affected area at the circuit breaker, and if you are comfortable doing so, remove the light fixture cover to inspect the wiring connections. Tighten any loose wire nuts or terminal screws that you find. If you encounter any damaged or frayed wires, contact a licensed electrician for repairs.
9.3 Determining if it’s a single circuit issue
If flickering lights are not limited to a single fixture or room, it may indicate a problem with a larger electrical circuit. Test other lights and devices connected to the same circuit to see if they are also experiencing flickering. If the issue is isolated to one circuit, move on to the next step.
9.4 Consulting an electrician for deeper analysis
Flickering lights can sometimes be a symptom of a more significant electrical issue within your home’s wiring system. It is advisable to consult with a licensed electrician for a thorough analysis and necessary repairs. They will have the expertise to identify any underlying issues and implement the appropriate solutions to prevent further flickering and ensure electrical safety.
9.5 Ensuring safety precautions
When dealing with flickering lights, it is essential to prioritize safety. Turn off the power to the affected area before inspecting or making any changes to the wiring. If you are uncertain or uncomfortable working with electrical components, do not hesitate to seek professional assistance. Safety should always be the top priority when dealing with any electrical issues.
10. Electrical failure: High electricity bills
If you notice a significant increase in your electricity bills, it may indicate an underlying electrical issue or inefficient usage. Here’s how to address high electricity bills.
10.1 Conducting an energy audit
Start by conducting an energy audit of your home to identify potential sources of energy waste. This can be done by reviewing your energy consumption patterns, inspecting appliances and devices for energy efficiency, and assessing insulation and weatherproofing measures. Identifying areas where energy is being wasted will help you take targeted steps to reduce your electricity bills.
10.2 Inspecting for energy leaks
Energy leaks, such as drafty windows, poorly sealed doors, or gaps in insulation, can cause energy inefficiency. Inspect your home for any areas where air may be escaping or entering, such as around windows, doors, and outlets. Seal any gaps or cracks and consider adding additional insulation to improve energy efficiency and reduce energy costs.
10.3 Upgrading to energy-efficient appliances
Outdated or inefficient appliances can contribute to high energy bills. Consider upgrading to energy-efficient models that have earned the ENERGY STAR certification. These appliances are designed to consume less energy while maintaining their performance. Upgrading major appliances such as refrigerators, washing machines, and HVAC systems can make a significant impact on your electricity bills over time.
10.4 Using power-saving practices
Developing power-saving habits can help reduce your electricity bills. This includes simple practices such as turning off lights when not in use, unplugging electronics and chargers when not needed, and utilizing natural lighting and ventilation whenever possible. Adjusting thermostat settings and using energy-saving modes on appliances can also contribute to lower energy consumption and reduced bills.
10.5 Seeking professional advice for further optimization
If you have conducted an energy audit, implemented energy-saving practices, and made necessary upgrades to appliances and insulation but still experience high electricity bills, it may be beneficial to seek professional advice. An energy auditor or a licensed electrician can provide a comprehensive analysis of your energy usage and recommend further optimization measures specific to your home. They can identify any hidden energy inefficiencies and suggest customized solutions to help reduce your electricity bills.